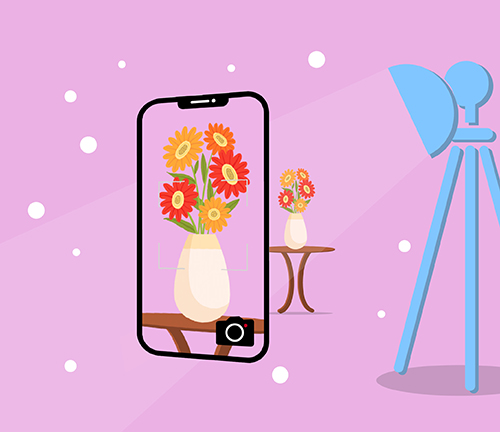
Take better photos with your phone camera
The scene is set. You strike a pose. You can already see the Instagram likes rolling in. You take the picture and…
It’s just not the one. And now the moment’s gone.
With today’s phone cameras, it can be reasonably easy to take high quality snaps with just the touch of a button. Although, there’s also never been so many settings to take advantage of to really take your photos to the next level – but what do they do and how can you make the most of them?
Let’s take a look at some key hardware, settings and best practices, so you can always get the best from your phone camera.
Hardware, specs and settings
Megapixels
Megapixels (MP) are a million pixels, the tiny dots that make up a picture. These are often listed as the main stats of phone cameras. While more MPs are generally good, they’re not necessarily what make a great camera, given various other specs and settings can make greater contributions to picture quality.
Sensor size
Sensor size refers to the sensors within cameras that capture light and convert this into the information, creating pictures. Therefore, larger sensors are usually better, as they allow more detail to be captured. In smartphones, sensor sizes typically range from around a sixth of an inch to an inch.
Aperture
Similarly, aperture refers to the opening in a lens that lets light into the camera to reach the sensor. Aperture is measured in units called f-stops, depicted by an f followed by a slash and number (e.g. f/1). Larger numbers actually indicate smaller apertures and vice versa - so higher f-stops let in less light and smaller f-stops let in more. Aperture also impacts your photo’s depth of field, the clarity of your image’s background. Lower f-stops reduce this, making backgrounds more blurred, whereas higher f-stops will increase it and capture background details more clearly.
Nowadays, apertures ranging from around f/1.5 to f/2.2 are common on smartphone cameras. Depending on your phone, you may be able to select different apertures in the pro mode of its camera settings, so you can adjust to suit the situation.
ISO
Like aperture, ISO relates to light. However, whereas aperture determines how much light reaches the sensor, ISO controls the sensor’s sensitivity to it to ensure suitable exposure in the picture. Therefore, lower ISO settings reduce the camera’s sensitivity to light and make a better option for taking pictures in good lighting. Alternatively, higher ISO settings increase the camera’s sensitivity to light, so will be better suited to taking pictures in darker settings. ISO is another setting available in many phone cameras’ pro modes.
Shutter speeds
Picking the right shutter speed can have a massive impact when taking pictures of a moving subject. Measured in either seconds or fractions of a second, the setting determines how quickly your camera’s shutter closes. Taking pictures of moving subjects at slower shutter speeds may create more motion blur, with the sensor being exposed to more light and therefore more data to process. Alternatively, faster shutter speeds expose the sensor for less time, so can capture sharper images. Note that as shutter speed also determines the camera sensor’s exposure to light, you can expect darker images from faster shutter speeds. This can also make slower shutter speeds more suitable for low light pictures.
Optical zoom > Digital zoom
If possible, it’s better to stick to optical rather than digital zoom when taking pictures. Optical zoom physically moves the camera lens closer to the subject, maintaining the image’s resolution. However, digital zoom instead crops an image and enlarges the cropped selection, which can hinder quality by stretching the pixels of the cropped selection. If your phone has optical zoom, you can usually ensure you are using this by tapping the preset zoom options available on your camera app when taking a picture.
Practical tips
Lighting
The position of light sources can significantly impact photos. Front facing light (where the subject faces the light source) is generally reliable for taking pictures of people and objects, allowing detail to be captured with less obstruction from shadows. If done well, side and back lighting can also be used to decent effect to create interesting imagery that makes use of shadows or silhouettes.
You will also want be mindful of the light’s intensity. Diffused soft light (like light from the sun at sunrise or sunset) can help minimise shadows and reduce the contrast between light and dark colours. Alternatively, hard light (like camera flash or the sun during the day) creates greater contrasts between lights and darks, and more pronounced shadows.
Position and angles
Like lighting, there are countless options for positioning your camera and the subject of your photo that can drastically change the image and its tone.
Most often, you will use an eye-level angle when taking pictures of people and everyday scenes, which helps give photos a natural appearance. Alternatively, you may want to try low angle (camera below subject and tilting upwards) or high angle (camera above subject and tilting downwards) shots to add a greater sense of perspective. Low angle shots can emphasise the scale of a subject, so often work well for photographing subjects like buildings. In contrast, high angle shots can make a subject appear smaller and/or place greater emphasis on surroundings. High angles are commonly used for things like photos from high places, of crowds, or children.
With regards to subject positioning, some general considerations to be aware of are the rule of thirds, leading lines and negative space.
The rule of thirds can be applied by dividing your camera frame into a grid of equal parts and positioning your subject along these lines and/or at their intersections, helping to ensure the subject is well placed. You can find gridline settings on many smartphone cameras. Similarly, leading lines are background elements that can draw attention to your subject, like architectural elements and roads – although if you’re picturing people, try to avoid any such lines passing behind heads, as this can be distracting.
Finally, consider how to use negative space – this is simply empty or unoccupied areas surrounding your subject, which can help to draw more attention to subject. If your subject is in motion and you’re taking your photo from the side, try to capture a good bit of space ahead of them so that your image is able to depict their movement effectively.
With all this in mind, hopefully you’re now feeling ready to take some spectacular snaps – be sure to share your best pictures in our community discussion!

- SMARTY Team
- SMARTY
- July 19th, 2023